
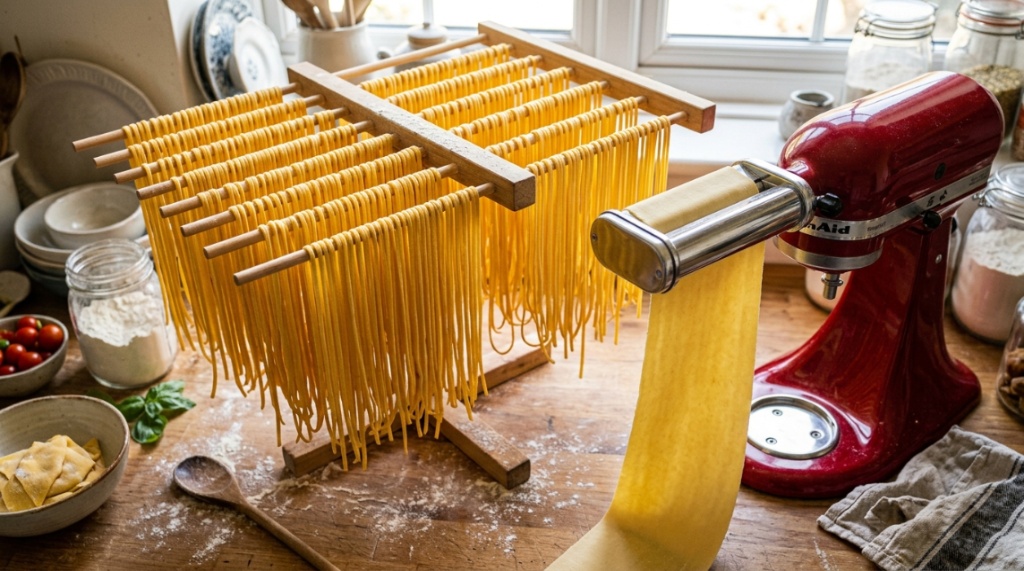
You’ve finally unboxed your KitchenAid stand mixer attachments, and now you’re staring at the gleaming steel rollers wondering if you’ve made a costly mistake. Maybe your last attempt resulted in a sticky, clumped mess that resembled a science experiment rather than dinner. Or perhaps you’ve been too intimidated to even try, leaving the attachments to collect dust in the back of a cabinet. The good news? That frustration is completely normal, and the solution is simpler than you think. Mastering these tools isn’t about culinary school training; it’s about understanding a few mechanical nuances and dough science basics. This guide is packed with actionable KitchenAid pasta attachment tips that will transform your kitchen workflow, saving you time and money while producing restaurant-quality noodles right at home.
Why Is My Pasta Dough Sticky and How Do I Fix It?
The root cause of sticky dough is almost always a hydration imbalance or a lack of proper resting time. The dough needs to be stiff enough to hold its shape without clinging to the rollers. If it sticks, it will tear, stretch, and turn into a frustrating mess that clogs the machine.
Understanding the Hydration Ratio
Standard pasta dough using “00” flour or all-purpose flour typically requires a hydration level of around 40-45%. This means for every 100 grams of flour, you add 40-45 grams of egg and water combined. If you are using a wet recipe, reduce the liquid by 10% initially. The dough should feel like slightly damp modeling clay—not sticky to the touch, but pliable.
The “Fingerprint Test” for Readiness
Press your thumb into the dough ball. If the indent springs back immediately, your dough is too wet. If the indent stays perfectly and the dough feels smooth, it’s ready. If the dough cracks at the edges, it is too dry; add a teaspoon of water and knead again. This test is non-negotiable for perfect pasta.
Fixing Sticky Dough Mid-Process
If you’re already feeding the dough through the rollers and it’s sticking, do not add flour to the dough ball. Instead, dust the sheet of dough lightly with semolina flour or rice flour. These coarse flours act as ball bearings, preventing sticking without altering the hydration of the main dough structure. Stop the machine, cut the sheet, dust it, and restart.
Which KitchenAid Attachment Should I Use First?
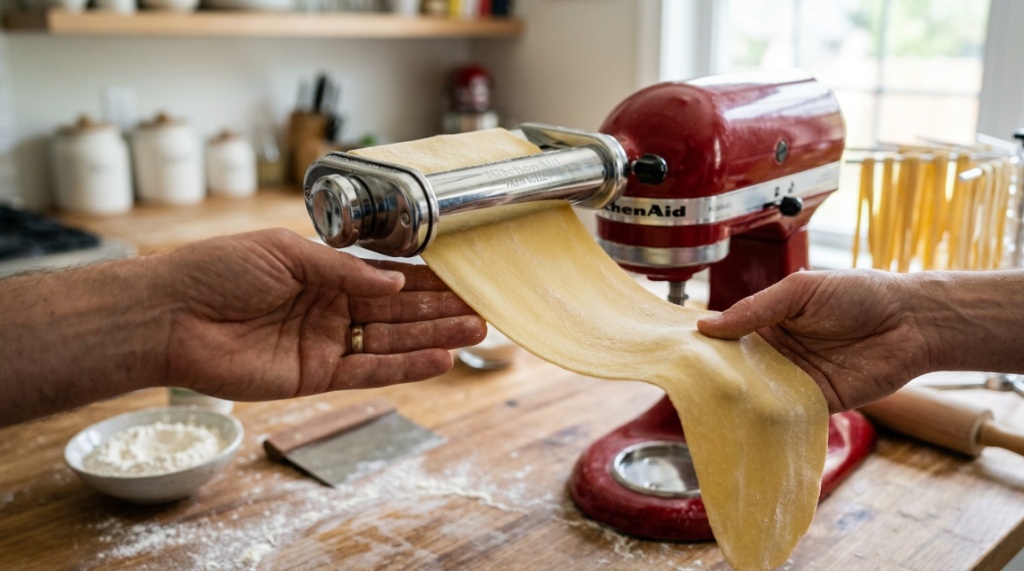
For most home cooks, the standard 3-piece set (Roller and two Cutters) is the best starting point. However, the order of operations matters. You should always use the Roller attachment to set the thickness *before* you even think about using the cutter attachment.
Breaking Down the Roller and Cutter Set
The roller is your primary tool; it presses the dough into thin sheets. The two cutting heads (one for fettuccine, one for spaghetti) are used exclusively at the end. Using a cutter too early will result in gummy, misshapen strands because the dough hasn’t been properly compressed yet.
When to Consider the Extruder Attachment
If you prefer shapes like penne, macaroni, or rigatoni, you need the Extruder attachment. This works differently than the roller system. It pushes dough through dies to create shapes. Note that extruded pasta requires a dryer dough (around 30-35% hydration) to prevent the pieces from sticking together as they exit the die.
A Quick Comparison of Attachment Types
| Attachment | Best For | Dough Hydration | Skill Level |
|---|---|---|---|
| Roller & Cutter | Flat noodles (Fettuccine, Tagliatelle) | 40-45% | Beginner |
| Extruder | Shapes (Penne, Macaroni) | 30-35% | Intermediate |
| Ravioli Maker | Stuffed Pasta | 40-45% | Intermediate |
How Do I Attach the Pasta Maker to My KitchenAid?
Attaching the pasta roller is a quick process that takes less than ten seconds once you know the trick. The key is aligning the attachment’s hub with the mixer’s power hub correctly.
Step-by-Step Attachment Guide
- Turn the mixer off and unplug it for safety.
- Remove the front hub cover by pressing it and twisting counterclockwise.
- Insert the pasta attachment’s shaft into the hub.
- Twist the attachment knob clockwise until it locks tightly into place.
- Plug the mixer in and set the speed to “2” (or “4” for extruder shapes).
Common Attachment Mistakes
Many users fail to twist the attachment until it clicks. If the attachment wobbles or slides off, you haven’t secured it properly. Additionally, never use the “Stir” speed; it is too fast and will shatter the dough.
What Is the Correct Speed Setting for Pasta Dough?
The ideal speed for rolling and cutting pasta is consistently the lowest speed on the mixer (Speed 2 on most models). This slow speed allows the dough to pass through the rollers evenly without stretching or tearing.
Why Low Speed Is Critical
High speeds heat up the dough, which triggers gluten formation rapidly. This results in a tough, rubbery noodle. Slow speeds mimic the hand-cranked machines of traditional Italian kitchens, giving the gluten time to relax.
Adjusting Speed for Extruder Shapes
If you are using the extruder attachment, you can bump the speed up slightly (Speed 4). This pushes the dough through the dies faster, preventing the dough from backing up and jamming the auger.
Can I Use Any Flour with the KitchenAid Attachment?
You can use almost any flour, but your success rate and texture depend heavily on the protein content. All-purpose flour works fine but yields a softer noodle. Semolina flour yields a firmer, more rustic noodle perfect for hearty sauces.
The Science of “00” Flour vs. All-Purpose
“00” flour is milled to a very fine texture and has moderate protein. This gives a silky mouthfeel. All-purpose flour has more protein, requiring slightly more hydration. If you swap flours without adjusting liquid, you will get a crumbly dough.
Gluten-Free Flours and Handling Tips
Gluten-free dough requires a binding agent like xanthan gum. It is also much more fragile. To prevent cracking, you must roll the dough directly onto a sheet of parchment paper, as lifting it by hand will cause it to rip. Do not try to fold gluten-free dough more than twice.
Why Is My Pasta Dough Tearing in the Roller?
Tearing happens when the dough is too dry, too cold, or you are trying to stretch it too thin in a single pass. Pasta must be rolled gradually through each thickness setting, never jumping from the thickest to the thinnest.
The Gradual Thinning Process
If you have a 9-setting roller, never skip more than two numbers at a time. For example, if you are at setting 5, move to 6, then 7, then 8. Skipping directly to 8 will stress the gluten network and cause tears.
Resting the Dough to Prevent Tears
After kneading, wrap the dough in plastic wrap and let it rest for at least 30 minutes at room temperature. This allows the gluten strands to relax. If the dough is cold, brittle, and tearing, let it warm up on the counter for 10 minutes before re-rolling.
How Do I Cut Pasta Without It Sticking Together?
Cutting is the final step, and it introduces the highest risk of sticking because the surfaces are freshly exposed and slightly moist. The secret is to use a generous dusting of coarse flour just before feeding the sheet into the cutter.
The Flour Dusting Technique
Lay the rolled sheet flat on a clean surface. Sprinkle semolina flour over the entire surface. Use a pastry brush to spread the flour into an even, thin layer. Flip the sheet and repeat. Pick the sheet up, feed it through the cutter, and catch the noodles with your other hand.
How to Store Freshly Cut Noodles
Immediately toss the cut noodles in a bowl with more semolina. Do not pack them tightly. For short-term storage, leave them spread out on a drying rack for 15 minutes. For long-term storage, roll them into small “nests” and place them in a freezer bag.
What Should I Do If the Attachment Gets Jammed?
Don’t panic. A jam is almost always caused by a piece of dough wrapping around the roller. The worst thing you can do is force the machine by turning the mixer on and off rapidly, which can strip the gears.
Safe Removal of Stuck Dough
- Turn the mixer off immediately.
- Turn the attachment dial counterclockwise to release tension.
- Gently pull the stuck dough out with your fingers.
- Check the gears for any remaining pieces before restarting.
Preventive Maintenance for Smooth Rolling
Never wash the pasta attachment in water. Water will rust the steel and ruin the bearing mechanisms. Instead, use a dry pastry brush or a toothpick to clean out the grooves. If the rollers seem stiff, rub a small amount of food-grade mineral oil on the gears—not the rollers—to lubricate them.
When Should I Use Semolina Flour vs. All-Purpose for Dusting?
Use semolina flour for dusting and tossing. It is coarse and gritty, creating tiny gaps between noodles that allow air to circulate, preventing clumping. All-purpose flour, being fine, absorbs moisture and turns into glue, making things worse.
Setting Up a “Dusting Station”
Before you start making pasta, prepare a small tray with a mix of 50% semolina and 50% all-purpose flour. This blend provides the grip of semolina with the fineness of AP to coat the dough without being gritty. Keep this station close to your mixer for quick access during the cutting process.
Can I Make Pasta Dough in the KitchenAid Mixer Bowl?
Yes, you can use the mixer with the dough hook to knead the pasta dough, but you must be cautious. Pasta dough is much stiffer than bread dough, and overworking it in the mixer bowl can overheat the motor.
Using the Dough Hook Correctly
Mix the ingredients on Speed 2 for about 2 minutes. The dough should clump together and climb the hook. If it doesn’t form a ball within 3 minutes, stop and knead by hand. The visual cue is a smooth ball with no dry patches in the bottom of the bowl.
The Case for Hand Kneading Pasta
Pasta dough benefits from hand kneading because you can feel the texture change as the gluten develops. Hand kneading for 8-10 minutes allows you to control the hydration precisely. If you use the machine, check the dough frequently to ensure it doesn’t dry out.
How Long Should I Air-Dry Pasta Before Cooking?
Fresh pasta cooks in minutes, but if you plan to store it, you need to dry it thoroughly. The drying time depends on humidity and thickness. A general rule is to leave it out until it feels like leather, not brittle.
Drying for Immediate Use vs. Storage
If you’re cooking within an hour, a 15-minute rest on a drying rack is enough. For refrigerated storage (up to 2 days), dry for at least 1 hour until the surface is no longer sticky. For freezing, dry for 30 minutes and freeze in single layers.
Troubleshooting Cracked or Brittle Dry Pasta
If your noodles crack when you bend them, they are too dry. To salvage them, place them in a sealed container with a damp paper towel for 30 minutes to rehydrate. This restores flexibility, though they may lose a bit of texture.
What Are the Best Sauces for Fresh Homemade Pasta?
Fresh pasta has a porous surface that absorbs sauces quickly. Because of this, thick, chunky sauces work best. Thin, watery sauces will seep through and leave the noodles dry.
Matching Pasta Shapes to Sauces
Fettuccine pairs beautifully with creamy Alfredo or a rich ragù; the wide ribbons hold heavy cream. Spaghetti, when cut thin, is best with a light olive oil and garlic sauce or a classic tomato basil to let the egg flavor shine.
Does Fresh Pasta Need Less Sauce?
Yes. A good rule is to use about 25% less sauce than you would with dried pasta. Toss the fresh pasta in the sauce for 30 seconds before serving to ensure every strand is coated without saturating the noodle.
Frequently Asked Questions
Do I need to dry the pasta before cooking it if I make it fresh?
No, you do not need to dry fresh pasta. In fact, cooking it immediately after cutting yields the softest, most tender texture. Drying is only necessary if you plan to store the pasta for later use or freeze it.
Can I wash the KitchenAid pasta cutter in the dishwasher?
Absolutely not. The dishwasher will corrode the metal and break the delicate cutting teeth. Always clean the attachments with a dry brush or a slightly damp cloth, and ensure they are completely dry before storing them.
Why does my pasta taste like metal?
This usually happens with first-time use or after cleaning with water. The metal rollers release a metallic taste if not seasoned. Run a small piece of plain dough through the rollers a few times, then discard that dough before using your real pasta dough.
Is it cheaper to make pasta at home versus buying it?
High-quality dried pasta is cheap, but fresh, artisanal pasta is expensive. Making pasta at home is significantly cheaper than buying fresh gourmet pasta and far more rewarding, costing roughly 50 cents per pound in ingredients.
Can I use the pasta attachment to make ravioli?
Yes, the roller works perfectly for making ravioli. Roll out two sheets of dough, place your filling in spoonfuls on one sheet, brush with water, and press the second sheet on top. Use the cutting wheel or a knife to separate the squares.
You can use the pasta attachment to make ramen noodles?
Yes, you can make ramen noodles using the spaghetti cutter attachment. Use a dough recipe featuring bread flour, water, and kansui (alkaline water) for that characteristic springy texture and yellow color. The process is identical to egg pasta.
What is the best way to store the pasta attachment?
Store the attachments in a dry, cool place. Hang them or keep them in the original box to prevent them from being knocked around. Always ensure they are completely dry before storing to prevent rust.
Conclusion
Mastering your KitchenAid pasta attachments is less about following a rigid recipe and more about learning to read your dough. You now know that stickiness is a hydration issue, tearing is a technique issue, and jams are a maintenance issue—all of which are easily solved with the methods we just covered. Start by practicing the “fingerprint test” and get comfortable with the gradual thinning process.
Your next step isn’t going to be a complex ravioli. Instead, commit to making a simple fettuccine this weekend. Set up your dusting station, rest your dough, and run the machine at Speed 2. The reward isn’t just a delicious meal; it’s the confidence that you can create something truly exceptional from scratch. Don’t let the attachments sit idle any longer—dust them off, flour your counter, and make the freshest pasta of your life tonight. Your family will taste the difference.