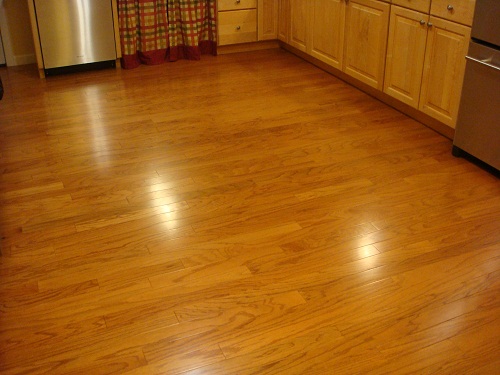
When it’s in good shape and looking great, wood flooring can make your home shine. It gives your house character and a classic sensibility that carpet or linoleum just can’t come close to. However, if it’s not looked after, wood flooring can look lackluster and dull and really drag your home down in terms of appearance and aesthetic. It’s extremely important to maintain your wood flooring and there are a number of procedures and tricks to help you do this the right way. Refinishing your wood floor the wrong way can scratch and permanently ruin the surface, so here are a few tips to help prevent that kind of damage so that you can ensure that your wood floor is in top condition.

- Cleaning the surface. It’s extremely important to remove and dust, dirt and grime from the surface of the wood floor. This will help prevent the surface from being scratched any more than it already has been. Be sure to remove all the furniture in the room to access the entire floor. You can use a simple hardwood flooring cleaner spray with a dash of vinegar to help loosen up any grime. Then, gently wipe the surface of the floor with a cloth mop or even a towel wrapped around a mop head. Make sure you keep all the windows and doors closed so that more dust doesn’t accumulate.
- Sand the outer perimeter. Before buffering the floor, it’s important that you get into all the nooks and crannies, so be sure to lightly sand the outer perimeter of the floor, along the skirting board, with a 180-grit piece of sandpaper. Try to avoid using a sanding block as to not miss any of the corners.
- Machine sand the floor. It’s worth renting a machine sander or buffer to sand the wooden floor. Be sure to wear a mask as there will be a lot of wooden particles flying into the air. Make sure you move in the direction of the grain and work the buffer from side to side, overlapping each line that you make by at least 5 inches. The floors old finish will turn to dust and powder, so you’ll see the color difference as you work your way through the room. Be sure to vacuum up the floor and the pad as you go to save yourself any additional scratching of the surface. Once you’ve finished the sanding process, vacuum the entire floor and collect any remaining dust with a felt bottom mop or cloth.
- Glaze the edges and then the center. First things first, make sure you’re wearing a mask or respirator; cover your shoes and pants so you don’t breathe in the vapors of the finish. When you glaze your floors, the fumes can get pretty intense. Get a wide paintbrush and paint the finish along the edges of the room about three inches wide along the baseboard. Once the edges are done, begin glazing or finishing the rest of the wood floor. It’s a good idea to use a long-handled roller brush for this task to apply the glaze smoothly. Be sure to work quickly and watch that the edges of each layer that you apply don’t dry too quickly or inconsistently. You don’t want to be left with any nasty smears or thick patches. After 3 hours, apply a second layer coat to the surface of the floor, including all the edges. Wait a week before you put all the furniture back as to let the finish dry properly.
- If all else fails, consult a professional. Yes, this task can be a DIY job, but if this is beyond your skill set, or just to ensure the job is done right the first time around, you can always consult the good people at Finish Pro who come with a wealth of knowledge and expertise when it comes to the finishing and maintenance of wood flooring.
You may also like Cleaning Laminated Floors


Average Rating